Coastal Collective Co.

makeover

Beach House Patio

Coastal Interiors, Edesign, Home Blog Posts, Our Beach House, Our Home, SummerAnneke McConnell

We have one more week until our kids go back to school, and while summer vacation is winding down, I realized I've shared our patio quite a bit on Instagram, but not on the blog. Better late than never!

I didn't get around to completing the entire plan I blogged about here, BUT it has been an amazing Summer here in the Pacific Northwest none the less and I have no complaints (well....other than we really need a better kayak storage solution!). The kids are healthy and happy and we've had a lot of great fun as a family. 

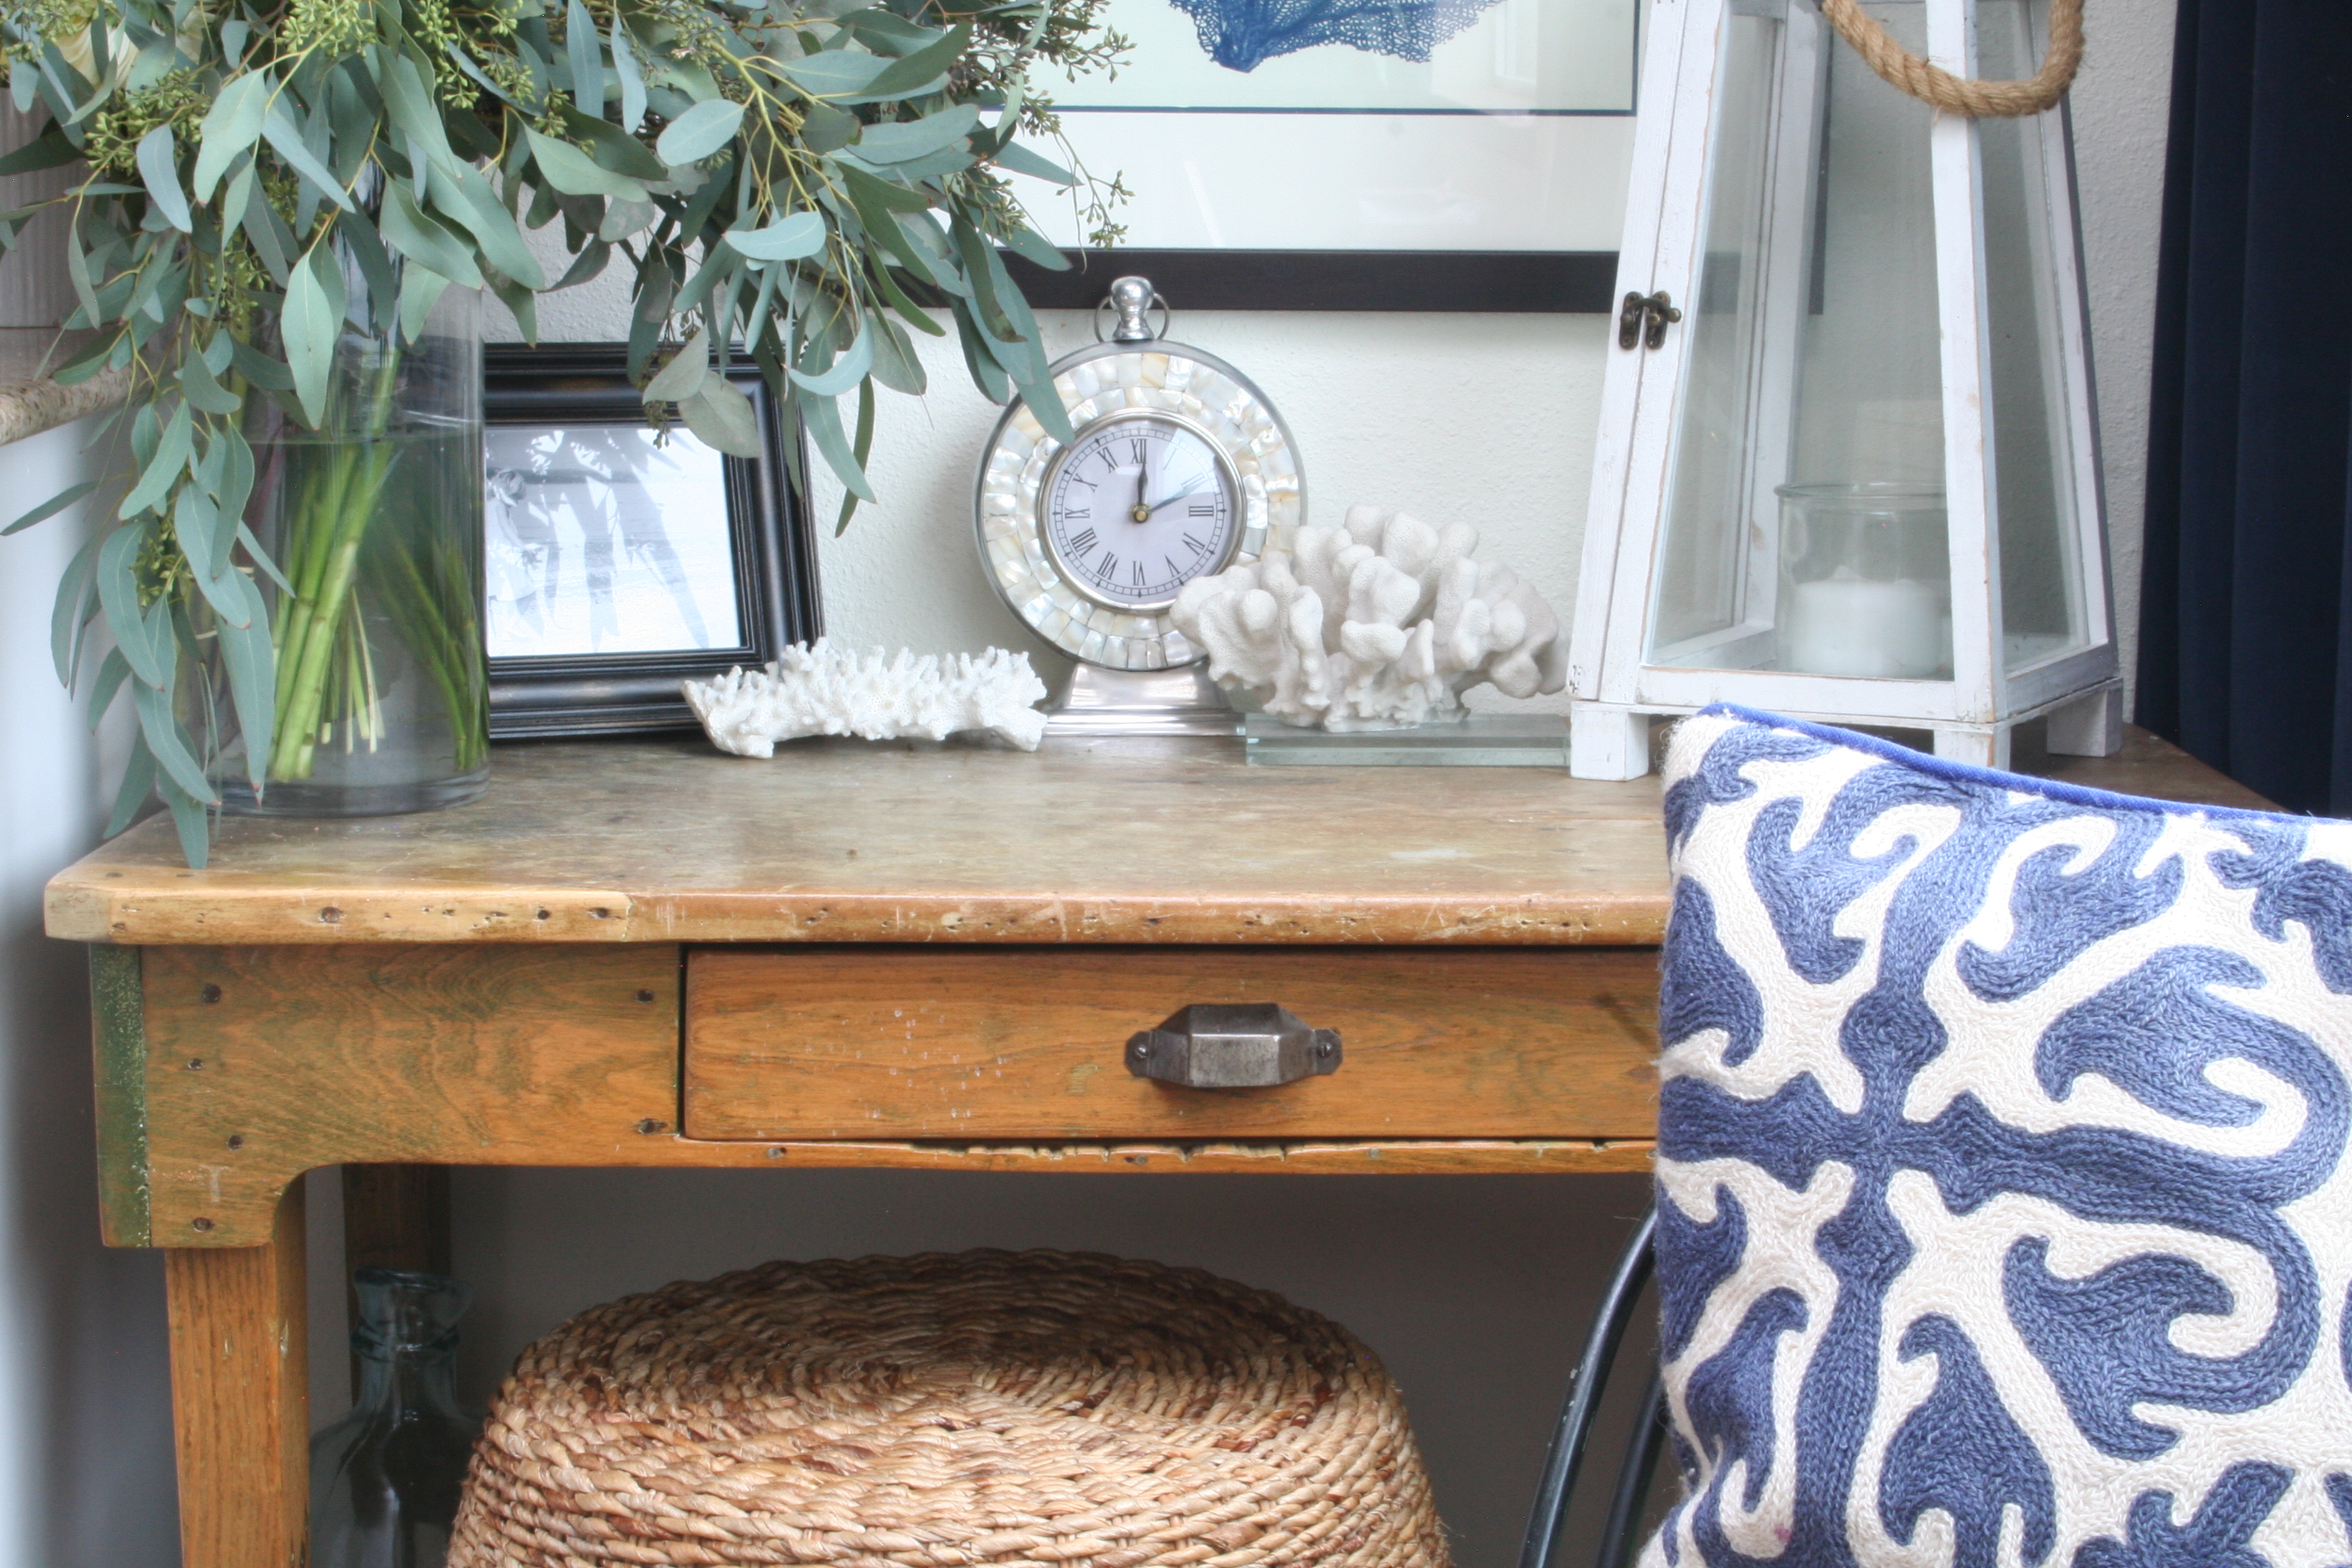
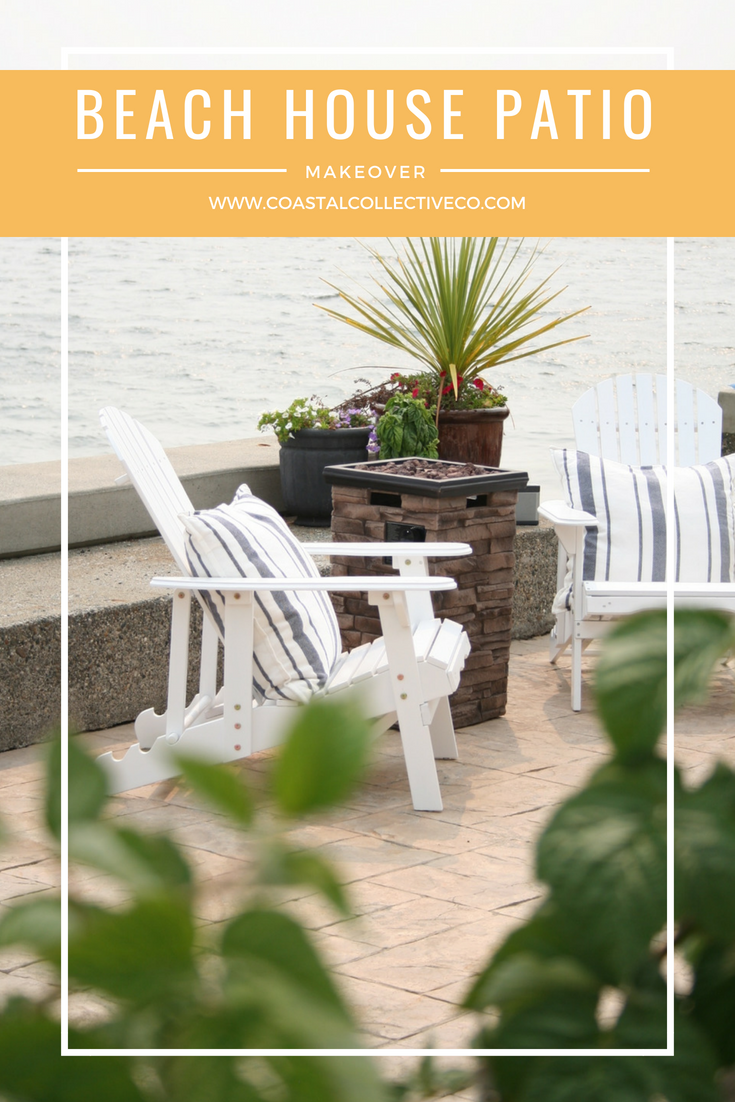
We recently had a progressive dinner on our street with all of our neighbors (walking beach side from patio to patio), which made for the perfect opportunity to photograph our progress on the space.  Here's what we ended up with for now!

*this site utilizes affiliate links

The good news for you is that we've had a season to be using all of these items (some more than a few years), so I have some pros and cons we've discovered with daily use. :-)

It's a little tough to capture this space since we are so close to our neighbor's (that we love) and I try to respect their privacy!

SHOP THIS POST

Here are a few things worth noting after using everything for awhile:

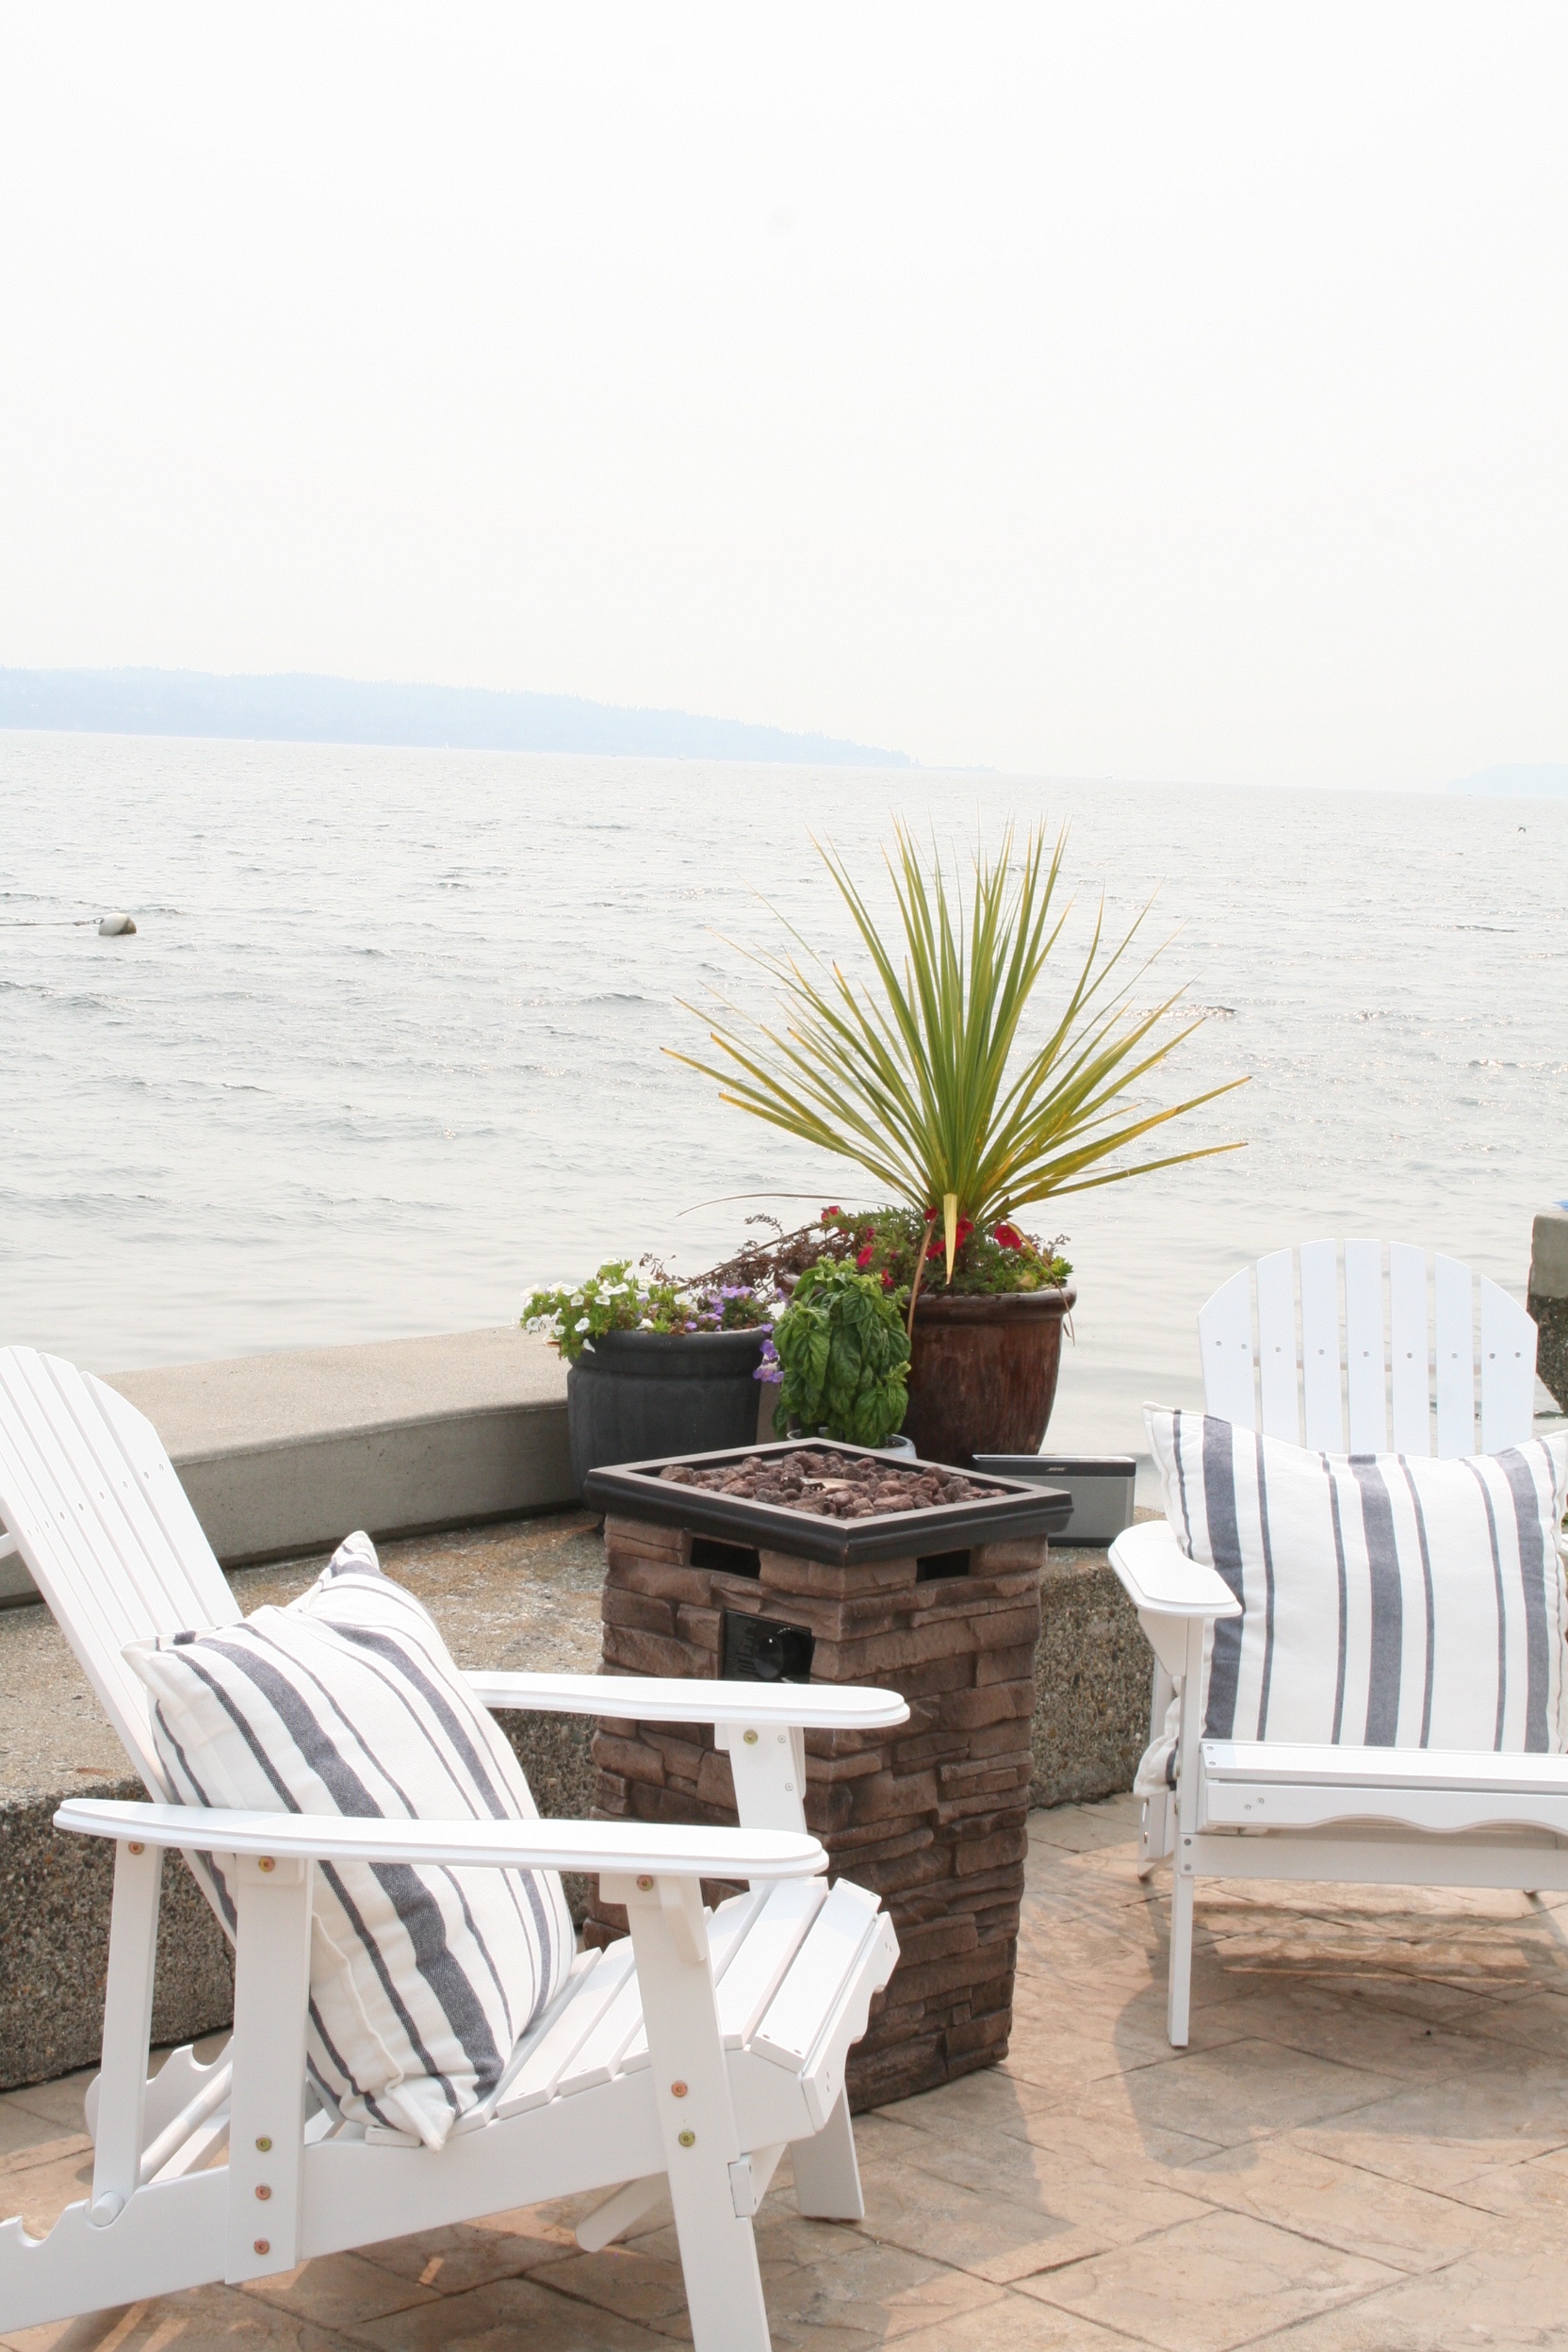
1. The adirondack chairs actually have self storing ottomans which we LOVE!! They recline to three different settings as well.  I shared this a lot in my IG stories, but forgot to capture it in these photos! We have loved having a set of these on our back deck. They are available in 4 colors, but classic bright white was a winner for us.

2. We've really enjoyed having an expandable table wood dining set for larger gatherings with friends and family. We previously had an older metal and glass table that was a stand in until we could get something larger.  Most of the time we have three of the chairs on each side and the ends have an outdoor wicker chair (ours are sold out, but for similar ones look HERE and HERE).

3. The HUGE umbrella is actually a rectangle.  I love that it is large and covers the entire set, along with the solar LED lights built in, but unfortunately we deal with enough wind that it will spin and get out of alignment. With a round umbrella that's no big deal, but a rectangle is something else.  If it's windy enough to spin the umbrella, it's not likely we are eating outside anyhow, so it's been okay.

4. The blue outdoor trellis rug underneath the dining table has unfortunately not been the best fit for our location.  It has faded pretty quickly with the sun beating on it everyday and whenever it gets wet from watering our plants or kids running around after swimming, it takes forever to dry and is just squishy under our feet. :-(  It's such a bummer because it is a really beautiful, soft rug and I'm certain it would work in other settings beautifully, like a covered dining patio or seating area, but it didn't work for us. From other experience, we will only buy rugs for our patio that are like THIS RUG because we know they dry fast and don't fade as easily.

5. The fire columns are a BIG YES!! They are so easy to use and move around. Plus, they put out just the right amount of heat and ambience with the adjustable flame.  Ours were from Target, but are sold out. HERE is a similar one.

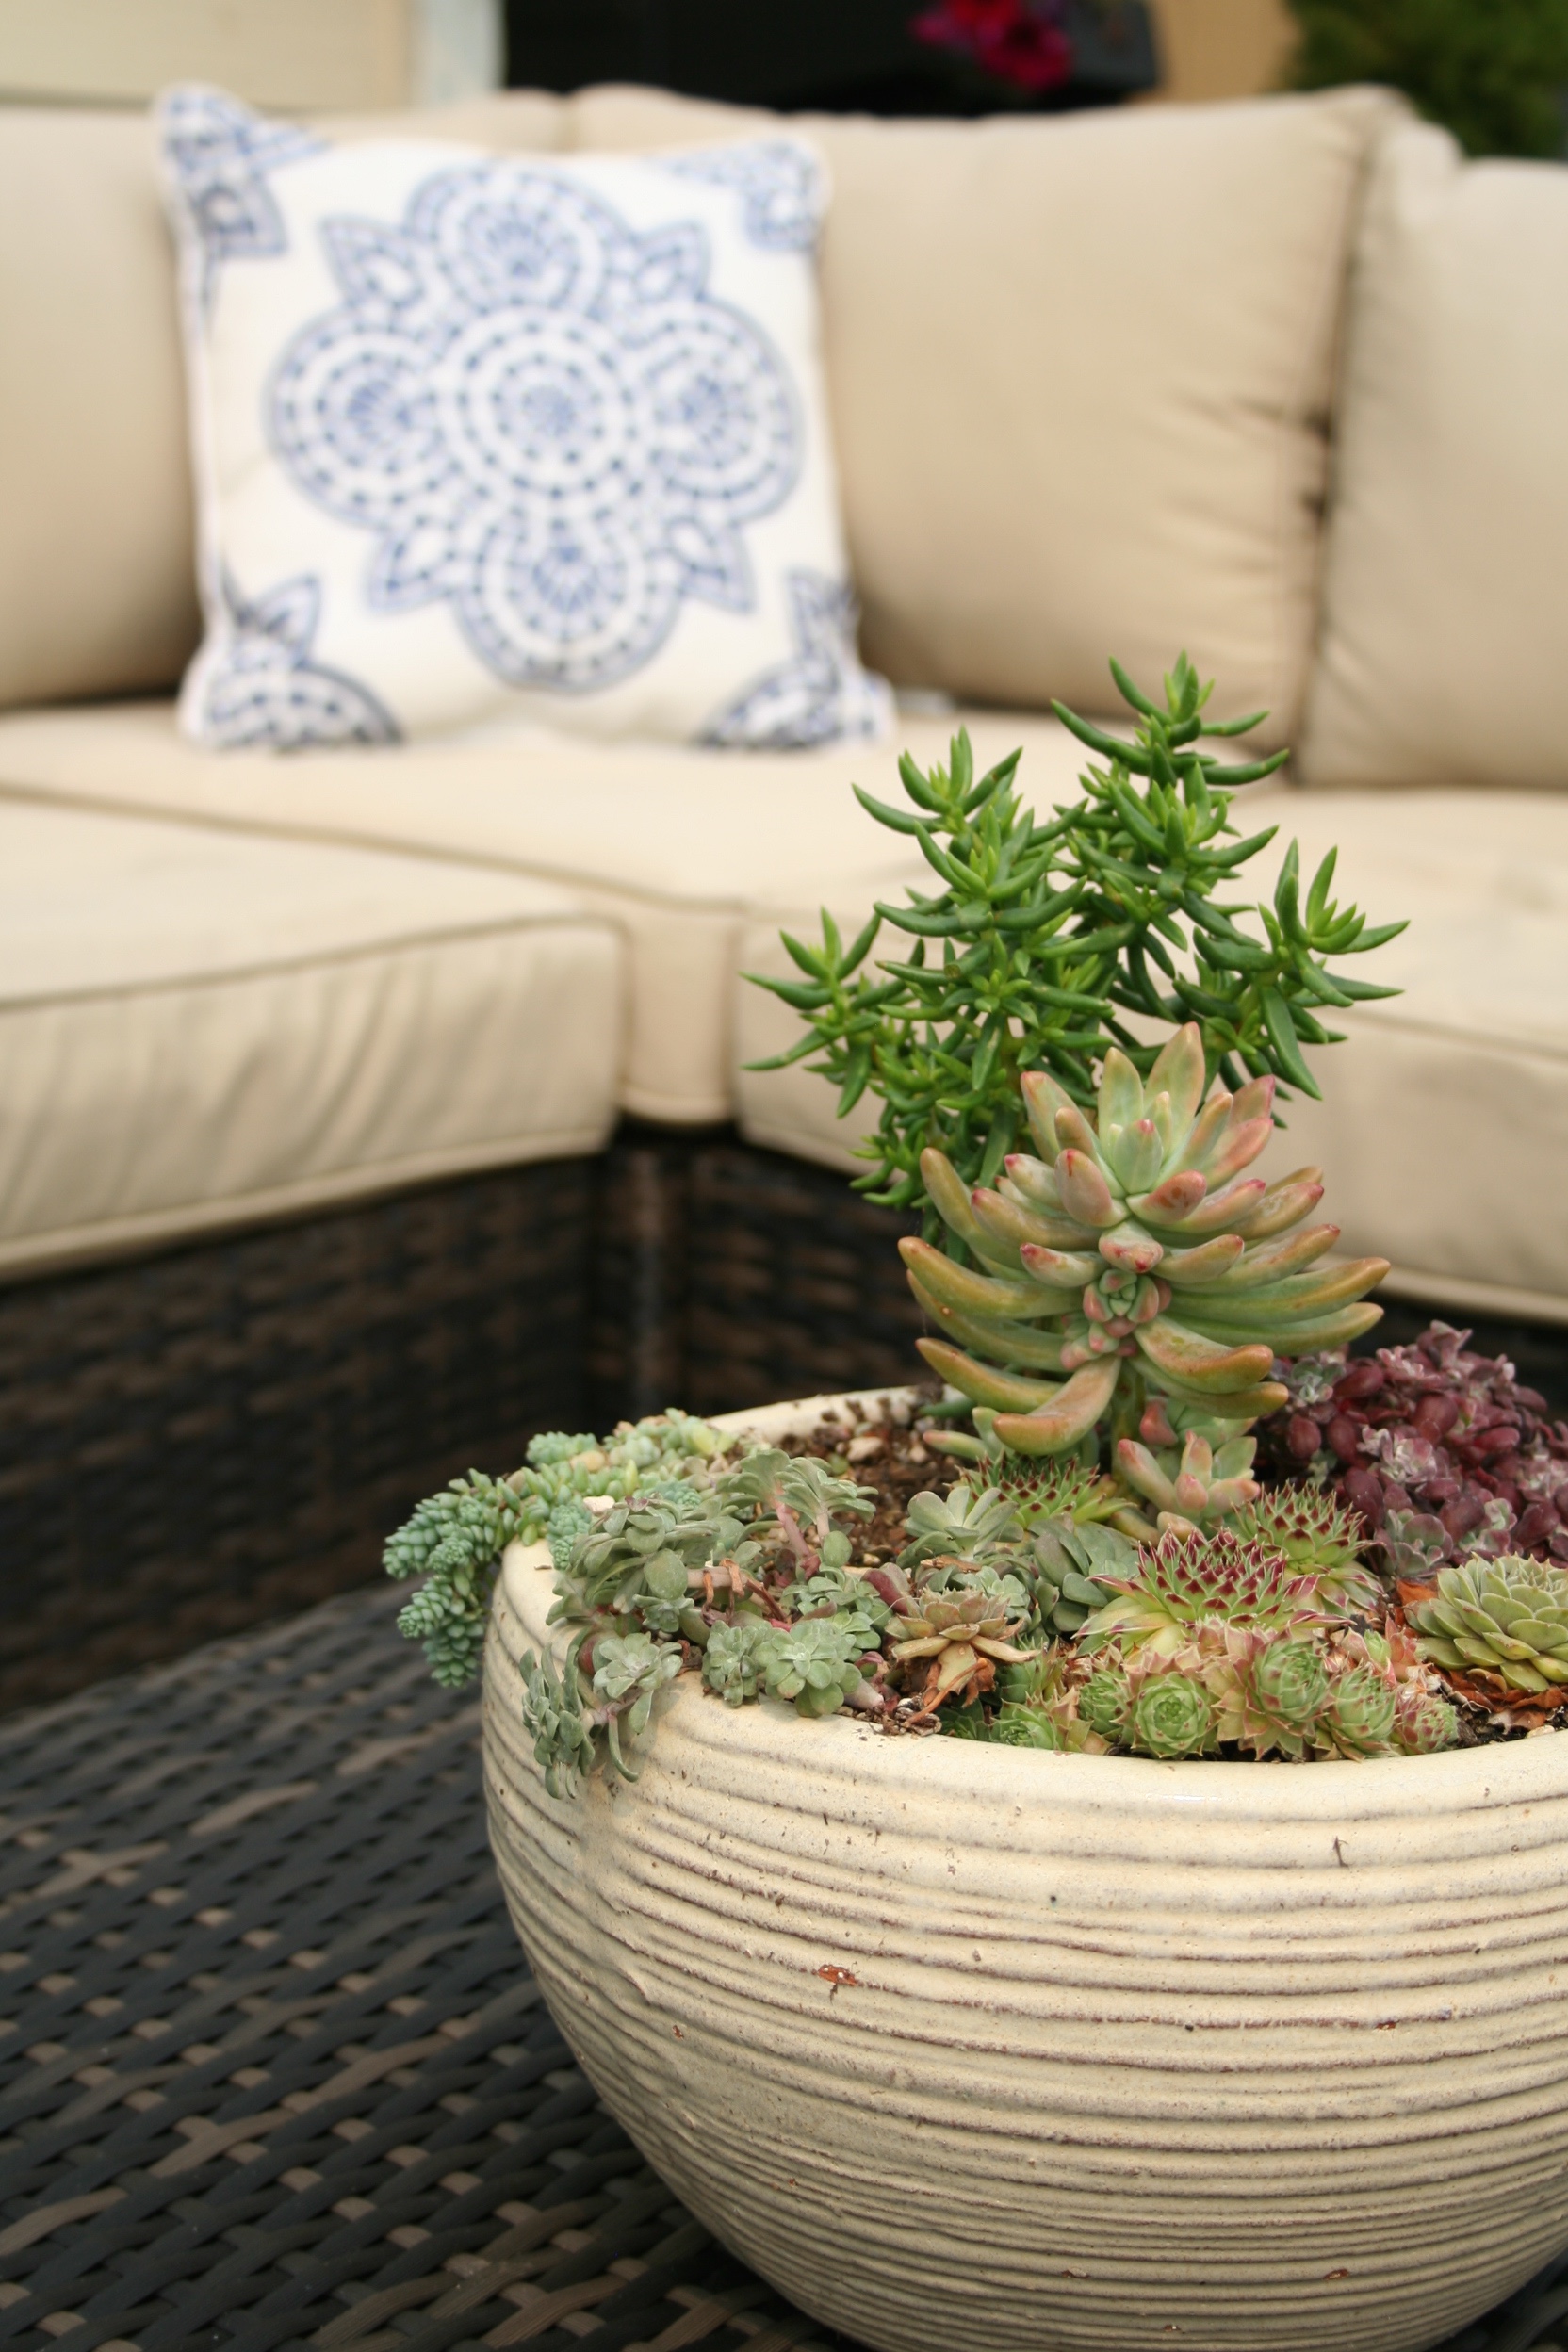
6. Last to make mention of is our patio sectional. We've had it a few summers now, and other than someone stealing one of our ottomans, it has been a great fit and held up to the elements. This is actually the first summer we had cushion storage, so I think that says a lot for holding up well to kids and bird fly-bys, snacking, sand, seaweed, and more.  We love that it is modular so it has seen a few arrangements over time. It used to be where our dining set is now! :-)

Β 

I hope our little beach house patio gives you some ideas and inspiration for your own space and these reviews help answer any questions you may have!

Cheers the the last few weeks of Summer!

Β 

From the Beach,

Anneke

Follow along on Facebook

Follow along on Instagram (lifestyle)

Follow along on Instagram (interiors)

Follow along on Instagram (diypaintedfurniture)

Β 

Β 

Β 

PLACES I SHOP AND RECOMMEND:

Serena & Lily

Joss & Main

Pottery Barn

Nordstrom

One Kings Lane

ASOS

Revolve

DSW

......just to name a few!

Β 

Β 

Disclosure: This website participates in affiliate programs. We are a participant in the Amazon Services LLC Associates Program, an affiliate advertising program designed to provide a means for us to earn fees by linking to Amazon.com and affiliated sites.

Β 

Β 

How To Whitewash Stone: DIY Fireplace Makeover

Home Blog Posts, Living Room, Our HomeAnneke McConnell

Want to learn how to paint furniture?

Grab my FREE Furniture Painting Guide below: 


Hi friends! I'm can't WAIT to share today's before and after with you!  It has actually been a few months since I finished this, but I'm finally able to share all of the details with you.  And with Spring just around the corner, I think a lot of us have some house projects on the brain.  


Thankfully this project was incredibly easy, not too messy, and took just a couple days to get done while the kids played and read books.

Ta-da!  Haha! We're so happy with the results!

Ok so here's the before you guys. You ready for this???

And now to see them side by side!

Thank you in advance for pinning and sharing my little ol' blog ideas you guys!  This is going to save people so much money and trouble!

Ok, so honestly over the years of sharing some home tours and whatnot, many people would say how much they LOVED our stone fireplace.   Every time this would happen, I'd check my attitude at the door because I have wanted to rip that thing down and out for awhile now and add beautiful wide white horizontal planking and marble and ALL things white and bright and coastal.  Did you know I love white? Lol


My husband and I go back in forth in our conversations about how much money we really want to invest in this home when we have different financial goals.  The options have ranged from "just live with it as-is" to "tear the entire thing down and rebuild a new home" to less extreme tangible options in between. ;-)

So here are some further details.

The fireplace has a funky hearth that is raised and sticks out that we still have yet to deal with.  This 18 inches or so will make a huge impact in our ability to place furniture in a more user friendly way in the long narrow space.

I've also personally never cared for the way the stone is recessed with sheetrock surrounding it, BUT without cutting into the sheetrock (which is an EXTREMELY messy endeavor) and giving the fireplace a more welcoming look that goes with the vibe of our style, whitewashing the stone was the perfect option.

Now our kitchen is open to the living and dining rooms, to to tie the spaces together I decided to paint the mantle the same color as the cabinets, Simply White by Benjamin Moore (we used Advance semi-gloss).  You can see our Kitchen Makeover series we did last fall here >>>>> kitchen makeover.


Ok so the process of whitewashing the stone is SO easy you guys.  

*some of the following are affilaite links. 


Here's a breakdown of supplies and the steps:

SUPPLIES:

Staining Pads >>> (this is THE SECRET to epic results. They are super absorbent, little to no drips, but great transfer of whitewash mixture)

Paint Brush >>> I use my trusted Purdy brushes. ;-) You want to make sure it is angle and medium to stiff bristles.

Plastice tupperware container

Chalk style Paint you can choose whatever color you'd like for your project (I used Annie Sloan Chalk Paint in French Linen for the first layer, and then Vintage Market and Design Chalk Paint in Dove for the final layer)

***Two alternative white colors I recommend are Rustoleum's Chalked Paint in Linen White OR Annie Sloan Chalk Paint in Pure White.

Water: to mix with the chalk paint

Work Towels >>> to clean any drips that may happen

Work Glasses and Rubber Gloves >>> YES, you should wear these!


DIRECTIONS:


1. Clean your stone with warm soapy water.

If your stone or brick is super glossy and slick or pretty dirty (unlike ours which was very porous and relatively dirt/soot free), you may need to use a product like TSP to get the job done. 


2. Take your paint, water and tupperware and create your whitewash mixture.

It doesn't matter what your ratio is, but you DO need to mix the same ration every time you make more mixture. I personally created a ratio of about 1:1  Too much water with create drips and lighter color.  Too much paint will not look translucent on the stone, but rather "painted on" and coated over the top of the surface.  If you're concerned about the paint not adhering, add a little more paint and always do a test spot first to see if you like the color and the way it looks when applied.


3. Apply the whitewash mixture one small section at a time.

Don't be afraid to really push your brush into the stone and brush with X-like motions to evenly cover the surface.  Working in a small section either one stone at a time like I did with our stone, or if you have brick working with a small area (for example 2 feet by 2 feet) is about right to brush on the mixture.


4. Use your staining pad to wipe any excess whitewash mixture.

Once you brush the whitewash mixture onto your small section, use your staining pad to wipe away the excess and even out the color.  This process moves along at an even pace, so you don't have to wipe the excess away quickly and you don't have to wait a bajillion hours either.

Just brush on, wipe off. Brush on. Wipe off.


******An alternative is to simply use your staining pad to apply the whitewash mixture if your stone is not too rough.  You can always test an area, but a rough stone will simply rip the material of the staining pad. A bristle brush really gets into the cracks and crevices of the stone more easily.


5. Repeat steps 3 and 4 section by section until complete.

6. If you are layering colors, wait for the first layer of your whitewash to completely dry.

I personally waited a day in between doing a base gray-wash layer, and a top white-wash layer.  Meaning I finished the first coat late at night, went to bed and woke up to start the second layer.  You likely don't have to wait that long, especially the more porous your stone is.


That's it! Easy peasy.  Thanks in advance for pinning and sharing this post and supporting this blog.  I appreciate you taking the time to stop by and hope this helps give you the confidence to give it a try!


Our Living Room

Thanks for stopping by and don't forget to enjoy the view!


xo, 

Anneke


Follow along on Facebook

Follow along on instagram at:

@annekemcconnell

@coastalinteriors

@DIYPaintedFurniture


Want to learn how to paint furniture?

Grab my FREE Furniture Painting Guide below: 

YOU MAY ALSO LIKE:


Kitchen Makeover Reveal

Home Blog Posts, Interiors, KitchenAnneke McConnell

Welcome if you are hopping over from the One Room Challenge!  It's been quite the push over these past six weeks to get one room completed, and we decided to tackle our kitchen, which we started this summer, but fizzled out on momentum.  More on that HERE.

We admittedly did not get everything done on our list, but I can say that I am just so happy with how it has turned out!  

Β 

Still yet to tackle:

  1. Trim out the kitchen sink window.
  2. Install backsplash (we did not paint since we are doing this).
  3. The lighting and window treatment were delayed, but will be installed as soon as they arrive.

Β 

NOT BAD!

Β 

Here's a recap so far -

Week 1: The Vision and Before Photos

Week 2: Painting the Cabinets

Week 3: Purging, Storage and Organization Solutions in the Kitchen

Week 4: Herringbone Tile

Week 5: Evaluating Progress

Β 

HERE IS THE BEFORE:

Β 

This reveal post is a little "lighter" than I'd like it to be since our kiddos were sick since last Wednesday and unfortunately it caught up to me this weekend, just after posting my last blog on Nautical Pendant Lighting. :-/ Boo!

I will be back this week with a full post that includes more photos and complete source details! As reference, the before photos were professional HDR photos taken for our home when it was a vacation rental.  The following were taken by myself, and although I'm improving, I'm thankful for these online courses that have taught me more about photography! 

Β 

Β 

SOME AFTER PHOTOS:

Β 

Navy Blue Velvet Drapes (mine are from Target, but they are sold out) / rug found on eBay


Desk was a craigslist find - $50!


Capiz Shell Table Clock (found at HomeGoods - HERE is a similar version)


Looks like I caught out cute little Maltipoo Copper sleeping on the job! I not so secretly love that his ears match the blanket. Lol (similar here)


And a sneak peek into our little living room off the kitchen.  I just updated the fireplace stone with some paint so details coming soon about that!

BEST armchairs for cuddling with kids, puppies, and a book or magazine!


Isn't this the cutest little wishbone jewelry tray I found for by the kitchen sink?! I got ours at HomeGoods, but found a similar one HERE.

Β 

Wishing you all a Happy Holiday Season! Thank you for your encouragement along the way!

Β 

xo,

Anneke

Follow along on instagram at:

@coastalcollectiveco

@coastalcollectivestyle

@coastalinteriors

Follow along on Facebook

Β 

Kitchen Progress: The Finishing Touches

Home Blog Posts, Kitchen, InteriorsAnneke McConnell

Wow. Only one week left until the full reveals for the One Room Challenge and I am admittedly feeling a "little" bummed, but not stressed.  Things are happening slower than I'd like, but I think that's just life. I have to make a choice to be at peace that I'm keeping my priorities in line.  :-) If you're just joining, you can see the first post and vision HERE.  And here is the before when our house was a vacation rental.


Our lighting will most likely arrive today or tomorrow and I CAN'T WAIT! I feel like it is going to make such a statement while providing the much need function of more light.

Β 

We chose the Hinkley Fulton Bronze Island Pendant Light (shown above) from Lamps Plus.  I'm thankful for the opportunity to work with them, and while this is not a sponsored post, they did work with us to provide lighting for our kitchen.  Not just that, but when I was struggling with a few options and dimensions, they were so very helpful in giving advice on the right fit.   They are known for legit great customer service like that as I've heard from others time and time again.

It really was quite the dilemma finding the perfect light because we are dealing with wanting the most number of bulbs/amount of light possible, yet have low 7.5' high ceilings, PLUS the higher full bar height.  We did not want to rewire and work with what we already had. We needed a lighting option that dealt with ALL of those factors, not to mention while adding character AND creating a visually streamlined look.  I can't wait to see this installed and share next week!

Last week I talked about how the husband and I talked about and agreed on herringbone tile.  I am SO happy about this!!! As a family in full-fledged hunting season (deer and elk), he has been gone every weekend for the past month, so this part of the project won't be rushed.  We'll hopefully have the window trimmed out and the tile installed before Thanksgiving though, so I hope you'll come back to see how that makes a difference from next week's reveal (which I think is spectacular in and of itself btw!).

As for the nook next to the kitchen cabinets, it is coming along with my favorite rustic desk and some blue coral artwork.  From drapes to chairs, to the kitchen rug, it feels like it's coming together nicely with the finishing touches.   I'd love to paint or wallpaper that part of the wall where this desk is, but it won't look quite right until the tile is installed with the pencil molding in place (this gives the installed tile that finished edge/look).

Β 

Because it was kind of a "down week", I directed some energy into working on lightening our fireplace stone.  Our kitchen, dining and living are all open in one small area, so although I was focusing specifically on the kitchen portion for this challenge, it only makes sense to work on the other areas when I can so they are compliment each other.  It has been a bit tedious, but easy to whitewash the flagstone. See the difference already! This was after the first layer of graywashing the stone before whitewashing it to make it even lighter, and I am painting the dark wood mantle the same white paint as the kitchen.

I love to "shop our home" occasionally and move things around for a different look and feel.  Because we are in the fall/winter season here at our beach house and not walking on the beach as much, I opted to use this rug of ours below (found on eBay!).  Since it is a smaller "scatter" type of rug, it has moved often over the past year, but I think will work perfectly in our kitchen in front of the sink.  I love the kilim look and will put it on top of our memory foam mat to keep things comfortable and not slipping around.  These don't look so pretty by themselves, but they make ALL the difference in comfort, so throwing a pretty rug over the top works great.

Oh! And Copper says HI! ;-)

Β 

Thanks again for joining us on our journey!

Β 

xo,

Anneke

Follow along on instagram at:

@coastalcollectiveco

@coastalcollectivestyle

@coastalinteriors

Follow along on Facebook